What is Image Compression Tool?
An image compression tool is a software or online tool that reduces the file size of images. It removes unnecessary data while keeping the image quality as good as possible. This helps images load faster on websites and apps.
Image compression tools are widely used in web development and digital marketing. They improve website speed, which is important for SEO and user experience. Faster loading pages also reduce bounce rate and increase engagement.
There are two main types of compression: lossy and lossless. Lossy compression reduces file size more but slightly affects quality. Lossless compression keeps original quality while optimizing size.
Using an image compression tool saves storage space and bandwidth. It also makes sharing images easier across different platforms. Overall, it is an essential tool for anyone working with digital images.
How This Image Compressor Works?
Here is a step-by-step guide for how this Image Compressor works:
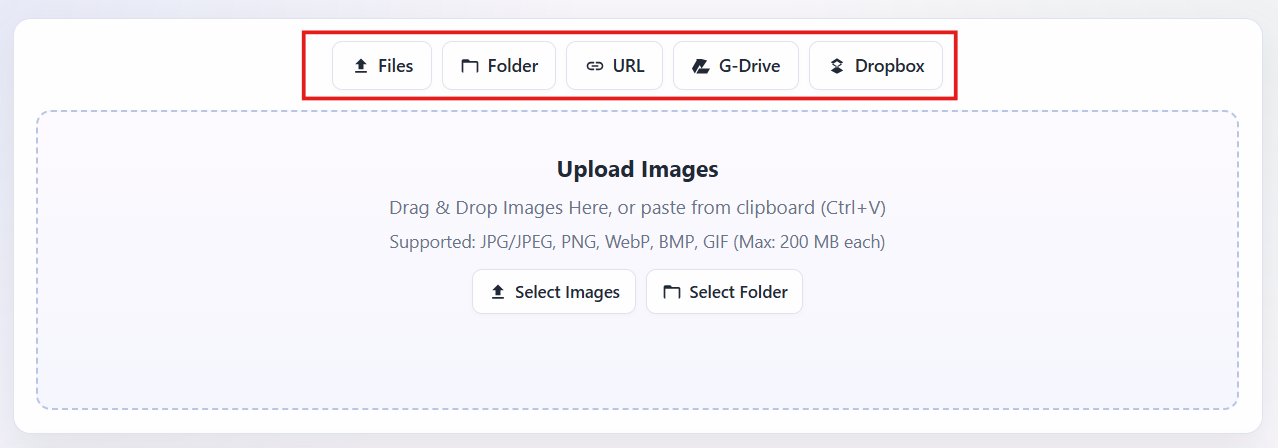
Step 1: Upload Images
- Click on “Select Images” or drag & drop your images into the upload area.
- You can also upload via Folder, URL, Google Drive or Dropbox.
Step 2: Choose Compression Settings
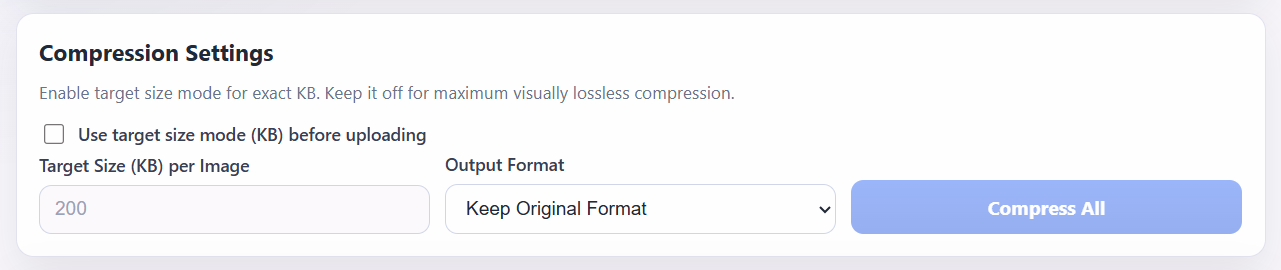
- Go to the Compression Settings section below.
- Enable Target Size Mode if you want a specific file size (in KB).
Step 3: Set Target Size (Optional)
- Enter the desired size (e.g., 200 KB per image).
- Skip this step if you want automatic compression.
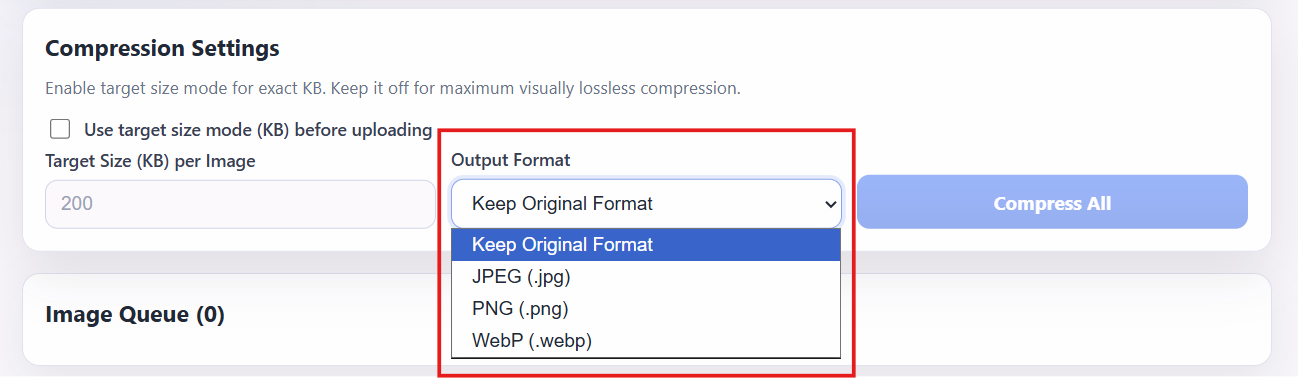
Step 4: Select Output Format
Choose your preferred format like JPG, PNG, WebP, or keep original.
Step 5: Start Compression (Optional)
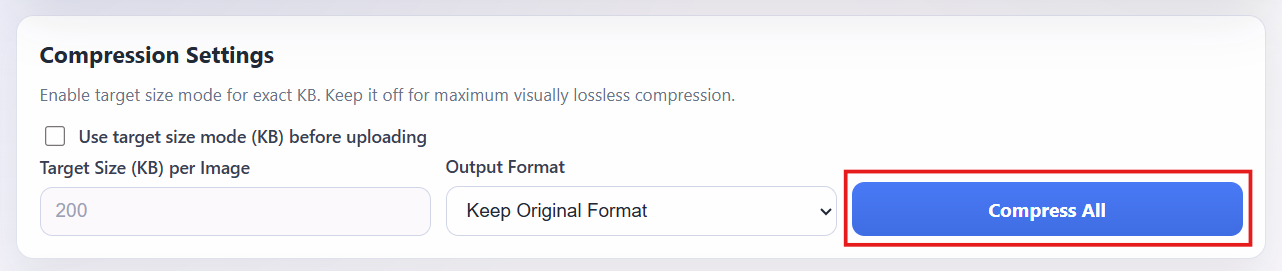
“The tool automatically starts the compression”
- Click on the “Compress All” button.
- The tool will process and reduce the image size.
Step 6: Download Images
After compression, download your optimized images.
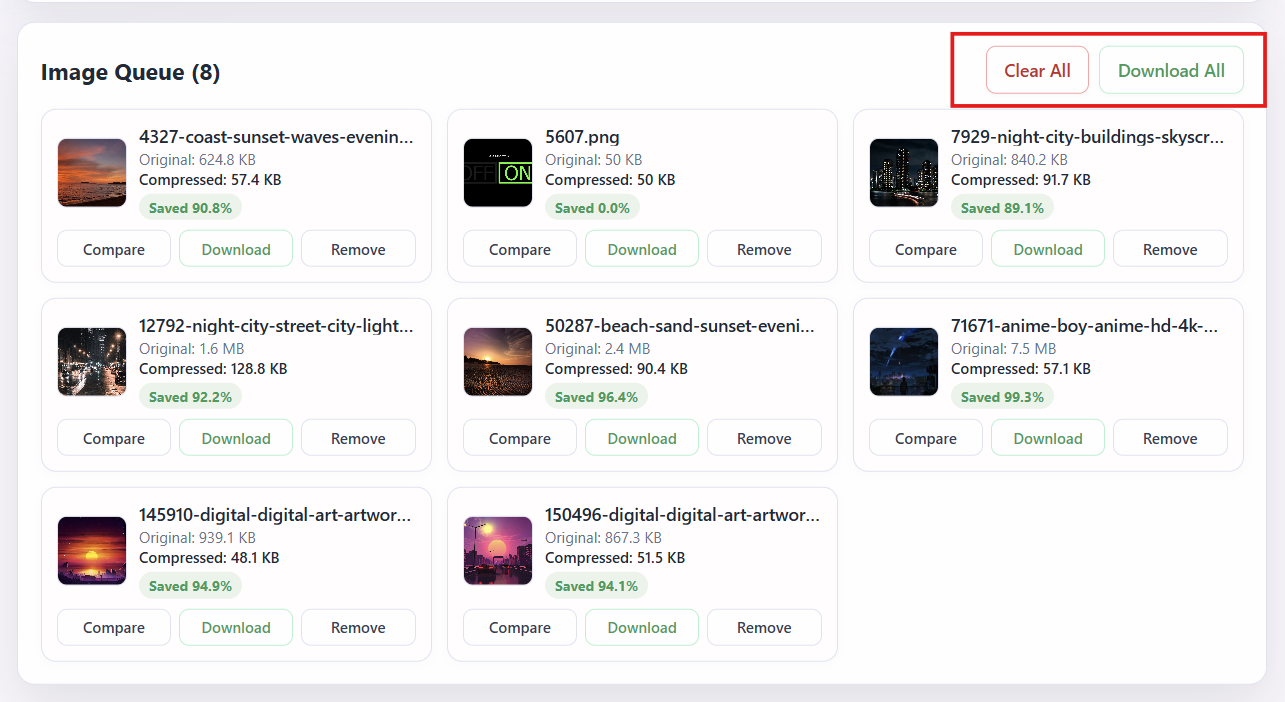
Benefits of Using Image Compression
➤ Faster Website Loading
• Images load quickly and reduce page load time
• Keeps visitors engaged and improves performance
➤ Better SEO Performance
• Faster speed helps boost search rankings
• Important factor for Google optimization
➤ Reduced Storage Space
• Smaller files save server and device space
• Helps reduce hosting costs
➤ Lower Bandwidth Usage
• Uses less internet data while loading
• Perfect for mobile and slow connections
➤ Improved User Experience
• Smooth and fast browsing experience
• Increases user retention and engagement
➤ Easy Sharing
• Lightweight images upload faster
• Ideal for social media and messaging
➤ Maintains Visual Quality
• Keeps image quality nearly the same
• No noticeable loss in most cases
Supported Image Formats Explained
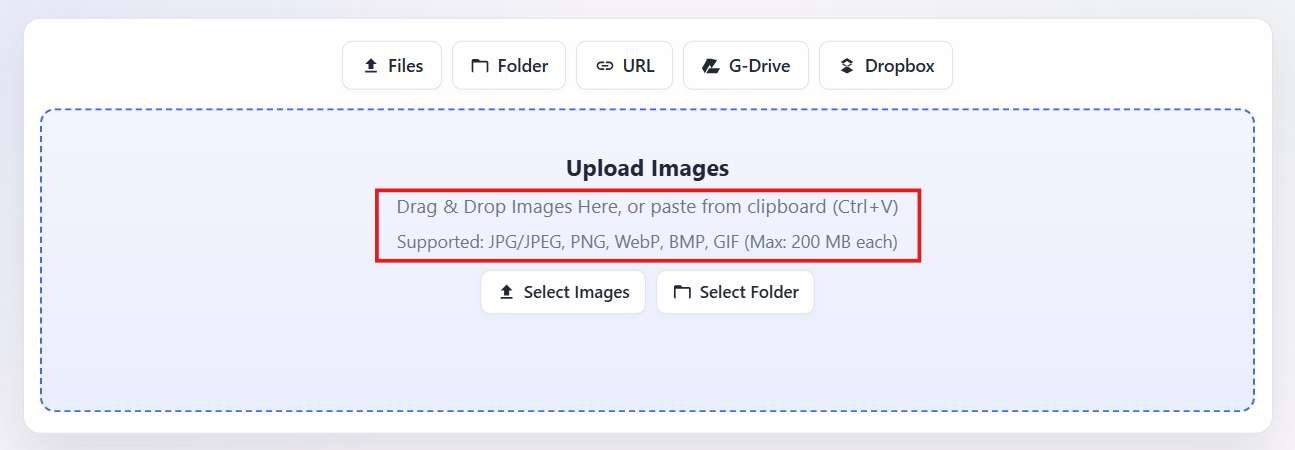
➤ JPG / JPEG (Joint Photographic Experts Group)
• Best for photos and complex images
• Uses lossy compression to reduce size
• Widely supported across all devices and platforms
➤ PNG (Portable Network Graphics)
• Supports transparent backgrounds
• Uses lossless compression for better quality
• Ideal for logos, icons, and graphics
➤ WebP (Modern Image Format)
• Provides high-quality images with a smaller size
• Supports both lossy and lossless compression
• Perfect for modern websites and faster loading
➤ BMP (Bitmap Image Format)
• Uncompressed format with high quality
• Large file size compared to others
• Mostly used for editing and storage purposes
➤ GIF (Graphics Interchange Format)
• Supports simple animations
• Limited to 256 colors
• Best for small animations and basic graphics
Lossy vs Lossless Compression Guide
| Feature | Lossy Compression | Lossless Compression |
|---|---|---|
| Quality | Slight loss in image quality | No loss in quality (original preserved) |
| File Size | Much smaller | Larger compared to lossy |
| Compression | Removes unnecessary data | Keeps all original data intact |
| Performance | Faster loading, ideal for web | Slower than lossy but high-quality output |
| Best Use Case | Websites, blogs, social media | Design, editing, archiving |
| Formats | JPG, WebP (lossy) | PNG, WebP (lossless) |
| Editing | Not ideal for repeated editing | Perfect for editing without quality loss |
How to Reduce Image Size Without Quality Loss
Step 1: Upload Your Image
- Click on “Select Images” or drag & drop into the upload area
- You can also use options like Folder, URL, or Cloud storage
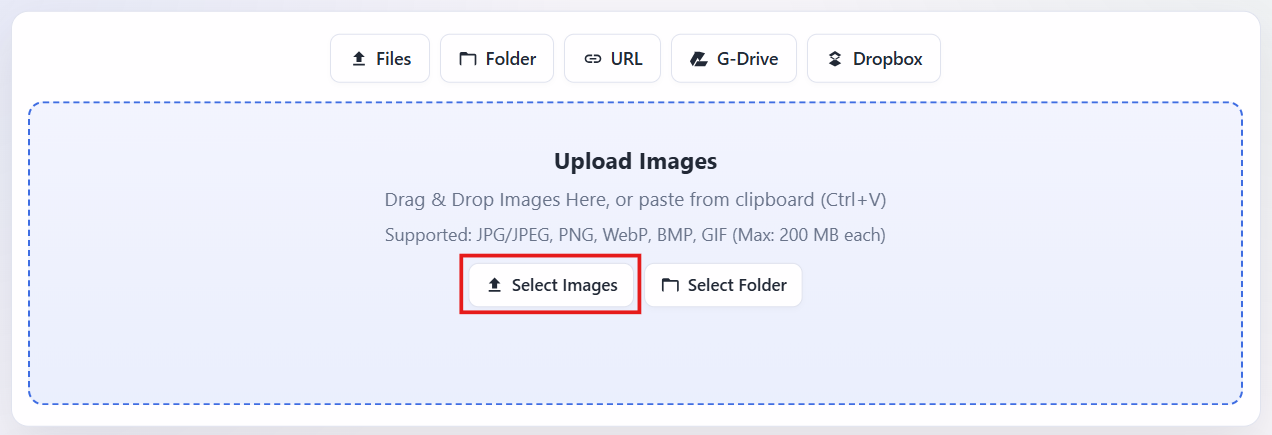
Step 2: Open Compression Settings
- Scroll down to the Compression Settings section
- Keep settings optimized for best quality
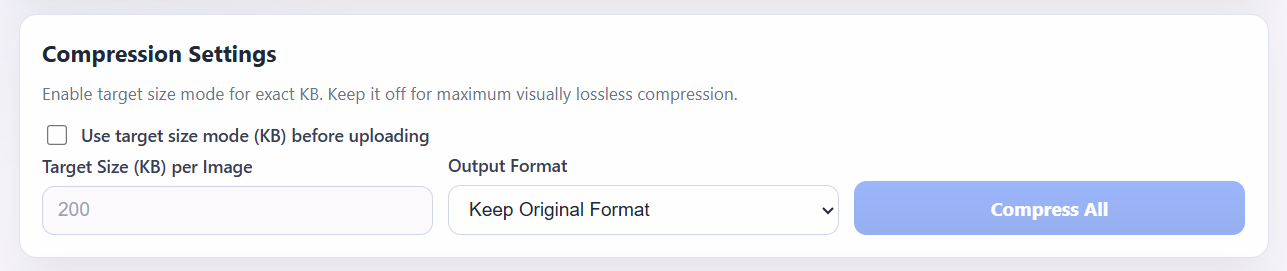
Step 3: Enable Lossless Compression
- Do NOT enable aggressive or high compression
- Keep visually lossless or default mode ON
Step 4: Set Target Size Carefully (Optional)
- If using target size, avoid very small KB values
- Choose a balanced size to maintain quality
Step 5: Keep Original Format
- Select “Keep Original Format” for best results
- Avoid unnecessary format conversion
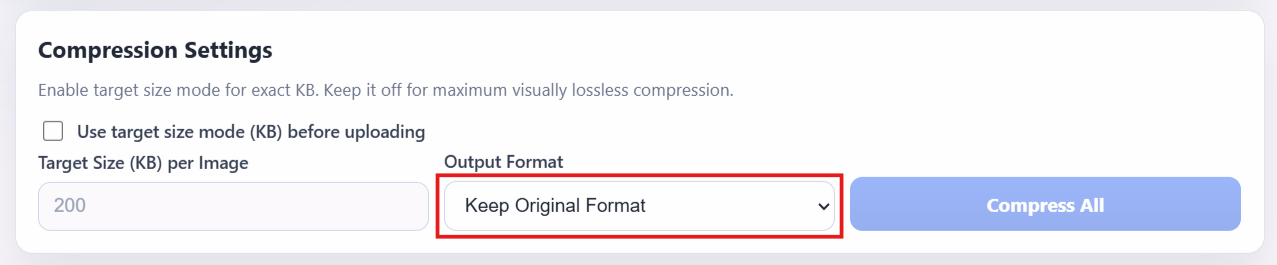
Step 6: Start Compression
• Click on the “Compress All” button
• The tool will optimize images without quality loss
Step 7: Download Optimized Images
- After processing, download your images
- Files will be smaller but visually identical
Best Settings for Image Compression
➤ Choose the Right Format
• Use JPG for photos and large images
• Use PNG for graphics and transparency
• Use WebP for the best balance of size and quality
➤ Set Optimal Quality Level
• Keep quality between 70% – 85% for JPG
• This gives smaller size with minimal visible loss
➤ Resize Image Dimensions
• Resize images to match your website layout
• Avoid uploading unnecessarily large images
➤ Use Lossy or Lossless Wisely
• Use Lossy for web and faster loading
• Use Lossless for design and high-quality needs
➤ Enable Target Size (Optional)
• Set a reasonable size like 100–300 KB per image
• Avoid too low values to prevent quality loss
➤ Remove Metadata
• Strip EXIF data (camera, location info)
• Reduces size without affecting visuals
➤ Use Modern Formats
• Prefer WebP for better compression
• Supports both lossy and lossless modes
Why Image Compression is Important for Websites?
➤ Faster Page Load Speed
• Compressed images load quickly on web pages
• Improves overall website performance
➤ Better SEO Rankings
• Page speed is a key ranking factor in search engines
• Faster sites get better visibility and traffic
➤ Lower Bounce Rate
• Users leave slow websites quickly
• Fast-loading images keep visitors engaged
➤ Reduced Server Load
• Smaller images use less storage space
• Helps reduce hosting costs
➤ Lower Bandwidth Usage
• Uses less data for loading pages
• Ideal for mobile users and slow networks
➤ Improved User Experience
• Smooth browsing with quick image display
• Increases user satisfaction and retention
➤ Mobile Optimization
• Lightweight images load faster on mobile devices
• Enhances performance on all screen sizes
Tips to Optimize Images for Faster Loading
➤ Resize Before Upload
• Upload images in exact display size
• Avoid using oversized images on web pages
➤ Choose the Right Format
• Use JPG for photos, PNG for graphics
• Prefer WebP for better compression
➤ Compress Images Properly
• Use compression tools to reduce file size
• Balance between quality and size
➤ Use Appropriate Quality Settings
• Keep quality around 70–85% for best results
• Avoid 100% quality unless necessary
➤ Remove Unnecessary Metadata
• Strip EXIF data like camera info and location
• Reduces size without affecting visuals
➤ Optimize for Mobile
• Use smaller image sizes for mobile devices
• Ensure fast loading on slow networks
➤ Enable Lazy Loading
• Load images only when they appear on screen
• Improves initial page load speed
➤ Use CDN (Content Delivery Network)
• Deliver images from nearest server location
• Speeds up loading globally
➤ Use Modern Formats
• Switch to WebP or next-gen formats
• Better quality with smaller size
Common Image Compression Mistakes to Avoid
➤ Over-Compressing Images
• Too much compression reduces image quality
• Makes images look blurry or pixelated
➤ Using Wrong File Format
• Using PNG for photos increases file size
• Always choose the right format for each use
➤ Ignoring Image Dimensions
• Uploading large images without resizing
• Slows down website performance
➤ Not Using Modern Formats
• Avoid sticking only to JPG/PNG
• Use WebP for better optimization
➤ Skipping Metadata Removal
• Extra data like EXIF increases file size
• Remove unnecessary information
➤ Setting Too Low Target Size
• Very small KB limits damage quality
• Always keep a balance
➤ Not Testing Image Quality
• Uploading without checking final output
• Always preview before using
➤ Compressing Multiple Times
• Repeated compression reduces quality
• Always use original image for best results
Image Size vs Image Quality Explained
Image size and image quality are closely connected, but they are not the same thing. Image size refers to how much storage space a file takes, usually measured in kilobytes (KB) or megabytes (MB). Image quality, on the other hand, describes how clear, sharp, and detailed an image appears to the human eye.
When you reduce image size using compression, some data is removed or optimized. In lossy compression, this can slightly reduce quality, especially if compression is too high. In lossless compression, the size is reduced without affecting visual quality, but the reduction is usually smaller.
Finding the right balance between image size and quality is important for websites. Smaller images load faster and improve performance, but overly compressed images may look blurry. The goal is to maintain good visual clarity while keeping file sizes low for better speed and user experience.
Image Size vs Image Quality
| Aspect | Image Size | Image Quality |
|---|---|---|
| Definition | Amount of storage space an image takes | Clarity, sharpness, and detail of the image |
| Measurement | KB (Kilobytes), MB (Megabytes) | Visual appearance (no fixed unit) |
| Focus | File weight and loading speed | Visual experience and clarity |
| Effect of Compression | Decreases with compression | May decrease (lossy) or stay same (lossless) |
| Impact on Website | Faster loading and better performance | Better visuals and user engagement |
| Trade-off | Smaller size = faster speed | Higher quality = larger file size |
| Best Practice | Keep as small as possible | Maintain acceptable visual clarity |
How to Compress Images for SEO?
Step 1: Choose the Right Format
• Use JPG for photos and PNG for graphics
• Prefer WebP for better compression and performance
Step 2: Resize Images Properly
• Adjust image dimensions before uploading
• Avoid using large images scaled down with CSS
Step 3: Compress Image Size
• Use an image compression tool to reduce file size
• Keep a balance between quality and size
Step 4: Optimize Quality Settings
• Set quality around 70–85% for best results
• Avoid 100% quality unless necessary
Step 5: Use Descriptive File Names
• Rename images with relevant keywords
• Example: image-compression-tool.jpg
Step 6: Add Alt Text
• Use clear and keyword-rich alt text
• Helps search engines understand the image
Step 7: Remove Metadata
• Strip unnecessary EXIF data
• Reduces file size without affecting quality
Step 8: Enable Lazy Loading
• Load images only when they appear on screen
• Improves page speed and SEO
Step 9: Use CDN for Images
• Deliver images from nearest server location
• Faster loading for global users
Mobile vs Desktop Image Optimization Tips
| Mobile Optimization | Desktop Optimization |
|---|---|
| Use smaller image sizes (100–200 KB) | Can use larger image sizes (200–500 KB) |
| Optimize for small screens (480–800px) | Use higher resolutions (1000px+) |
| Apply higher compression for speed | Use moderate compression for quality |
| Prefer WebP for lightweight performance | Use JPG, PNG, or WebP as needed |
| Critical for slow internet connections | Less strict on speed constraints |
| Must use lazy loading | Lazy loading is optional but useful |
| Reduce bandwidth usage | Bandwidth is less of a concern |
| Focus on fast and smooth UX | Focus on high-quality visuals |
Frequently Asked Questions (FAQ)
Q1: What is image compression?
Image compression is the process of reducing the file size of an image while maintaining acceptable quality for faster loading and better performance.
Q2: Does image compression reduce quality?
It depends on the method. Lossy compression may reduce quality slightly, while lossless compression keeps the original quality intact.
Q3: Which image format is best for websites?
WebP is considered the best for modern websites due to its small size and high quality. JPG and PNG are also widely used.
Q4: What is the ideal image size for web use?
Generally, keeping images between 100 KB to 300 KB is ideal for faster loading without noticeable quality loss.
Q5: Can I compress images without losing quality?
Yes, by using lossless compression, resizing properly, and removing metadata, you can reduce size without quality loss.
Q6: Why are large images bad for websites?
Large images slow down page speed, increase bounce rate, and negatively impact SEO rankings.
Q7: How often should I compress images?
You should compress images before uploading them to your website for the best performance.
Q8: Is WebP better than JPG and PNG?
Yes, WebP usually provides better compression and quality compared to JPG and PNG, making it ideal for web optimization.